At Imovie Library How Do I Begin Editing Again
Introduction to Basic Editing in iMovie
This tutorial will introduce some of the basic editing skills in iMovie.
Starting a New Projection
- Open iMovie. You should exist presented with a screen that looks like this:

This is the Project List, and information technology will evidence you all of the projects that you take made in iMovie. If this is your first time using the program, then yous might not see any projects listed in this window.
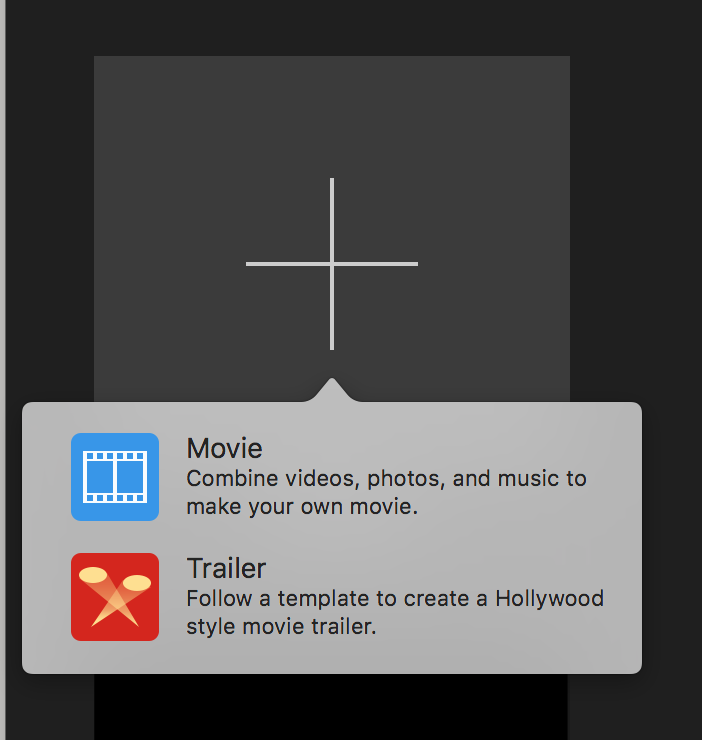
- To create a new project, select the Create New box, denoted by a big "plus" sign.

- Select Movie from the dropdown that appears.
Y'all volition and then be taken to the Project Interface, where you tin begin importing footage and editing your movie.

- Select the Projects Button in the upper left corner. A popup box will appear, assuasive you to enter a name for your project.


Keep in mind that y'all tin always rename your movie after from the Projects List.
- Double-click your projection in the Projects List to reopen it.
Notation: There is no Save command under the File card. This is considering iMovie autosaves at regular intervals and does not require you to manually salve.
The Projection Interface

The upper left section in iMovie is called the Outcome Library.

The Issue Library workspace grants you access to all imported footage, performance essentially like a media browser, and dividing your imported movies into folders chosen Events.
The next section is the lesser one-half of the interface and is chosen the Project workspace or Timeline.

The Project workspace is where you can access and build your movie from the files you selected from the Outcome Library workspace.
The section in the pinnacle correct corner is called the Viewer.

This Viewer window is where your footage volition play equally yous edit and sentinel the clips in your Project workspace. You lot will as well be able to brand many different clip adjustments in this section of the interface by clicking the adjustment icons at the top of the Viewer.
Importing Files from Your Figurer
- Select the Import push (downwardly pointing arrow) at the top of iMovie.

- A window will announced that allows yous to select the clips you desire to import. Use the menu on the left to navigate to your media either on the computer, external drive, or camera, that you wish to import.

At the elevation of the Import Window, you will also run across a bill of fare titled Import to: where you can select which Upshot yous would like the clips to import to.
- Click the Import to drop-down menu
- Select an existing Event or select New Result to create a new effect in which to import your video clips.

Editing Workflow Between the Event Library and Project
The Event Library workspace and the Project Timeline look similar. The major deviation between the two is that you cannot edit in the Issue Library workspace. All editing must occur in the Project Timeline. The most yous tin do in the Consequence Library is select a certain clip and elevate that clip into the Project Timeline.
- Select a video prune in your Event Library workspace that you would want to use in your Timeline. A xanthous box will appear around the selected clip.

- Click and elevate the selected video clip into your Timeline, and it will add the clip into your Projection.

Bones Editing in the Timeline
Now that we know how to add clips from our Event Browser to our Timeline, nosotros can offset to edit some of our footage.
Splitting a Clip
- To split a clip into two different clips, motility your Playhead (white line that follows your cursor) to the point yous want to carve up, and click on it.

- Select the Modify menu at the top of the screen.
- Coil downwardly to the middle of the driblet-down menu and choose Carve up Clip.

When you do, your clip volition be split into ii parts at the point where your Playhead was.

Trimming Clips
If you lot need to trim a clip downward because y'all've added too much of it to your Timeline, you tin can simply drag the ends of the clips in your Project Timeline workspace.
- Select the clip y'all wish to trim. Y'all will know it is selected when a yellow edge appears around it.
- Move your cursor to the left edge of the prune until your cursor turns into ii arrows pointing left and right.
- Click, concord, and drag left or right to either extend or shorten where you clip starts, respectively.

- Echo the previous ii steps on the right edge of the clip.

Source: https://mediacommons.psu.edu/2017/12/03/introduction-to-basic-editing-in-imovie/
0 Response to "At Imovie Library How Do I Begin Editing Again"
Post a Comment